How to SignUp
* Open the App and click on signUp.
* Fill Out the signup form.
* Upload your KYC Details.
* Update Vehicle/Keke Details.
* Submit and wait for approval.
Once the Account as been Approved.
* Login to your account.
* Allow Location Access.
* click on Go Online.
* wait for incoming requests.
How to Accept Incoming request
You will receive a Notification.
* New request Notification.
* Accept request.
* Click Arrive once arrive location.
* click on Start to start the trip.
* Request OTP from the user and submit.
* Click Complete once done.
* Rate User to continue to the Next request.
More Details
* Click on Wallet to see the current balance.
* Click on Payment Details to Update your Account Info.
* Click on Earning to see all earnings from past jobs done.
* View All Present and Past Job.
* Click on Home Icon to return.
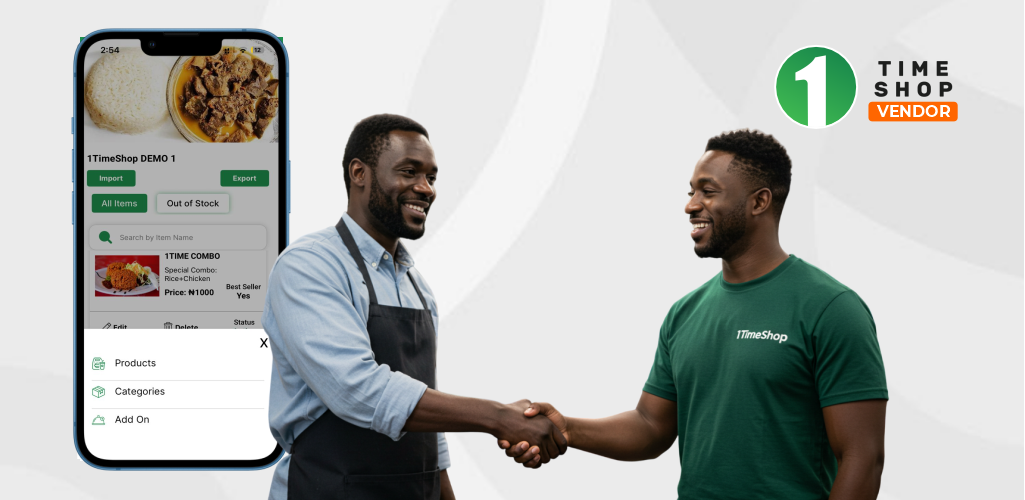
- Kindly go to 1timeshop.com on your browser. - Click on vendor registration, input your business name, note your address must be accurate, or enter the name of the city where you are currently located and select it from the dropdown menu. - Add your number but remove the first zero because you have already selected the country code. - Attach any valid ID card or CAC certificate. - Click on create an account. - An email will be sent to you to confirm if your account has been approved. - Kindly check your email to confirm your registration.
Visit our web page or download the 1TimeShop app from the Apple Store or Google Play Store.
- sign up using your mobile number.
- An OTP will be sent to your phone.
- Or Sign up with your social login (Facebook, Gmail or Apple ID)
- Fill out the registration form.
- Sign in and off you go.
- First off, you will receive an SMS and email upon any new order. Then you will accept order, process order, mark order for delivery and complete order. - To access your orders, go to the hamburger icon on the top left of your screen, click on orders, here you will see all your orders and statutes.
Restaurants
-There are 3 components to note
1. Categories.
This houses different products. The products are the Major meals that one would want to order. For example, The RICE CATEGORY {Fried Rice, White Rice and Stew, Jollof Rice, Basmati Fried Rice, Native Rice, etc}, The SOUP CATEGORY {Egusi soup, Vegetable Soup, Peppersoup of different kinds, etc) The SNACK CATEGORY (Shawarma, Pancakes, Chicken Pie, Doughnuts, Eggroll, etc) The PASTA CATEGORY (Spaghetti, Noodles, Macaroni, etc}
2. Addons
These are additional items served alongside the products. For example, Rice {TAKEAWAY PACK, PROTEINS (fish, chicken, egg, beef, etc), SIDES (Coleslaw, fried plantain, Moimoi, etc), DRINKS, etc}
Soups {TAKEAWAY PACK, PROTEINS, CHOICE OF SWALLOW (eba, fufu, semovita, pounded yam, etc), DRINKS, etc}
Snacks (Drinks, Smoothies, Icecream).
3. Products
These are the main products/meals that are available for order.
Marketplace
1. Categories
For example, Beverages (Different brands of milk, Tea, Coffee, etc), Frozen Foods(Turkey, Chicken Wings, Tilapia Fish, etc) Food Items ( Rice, Beans, Palm Oil, etc), Canned Food (Sardines, Black beans, etc)
2. Products.
3. Attributes. (You can ignore this).
- First, you have to add your categories of food/groceries. - Click on the hamburger icon on the top left of your screen, click on categories, and click on 'add new category'. Create a category name that comprises a certain product e.g. (Rice, beans, protein, etc.). Add as many Categories as you deem fit. - Next, click on the products icon, go to the right-hand side of your screen, and then add a new product, click on the display name of the product and then add a short description of your product. You can also click to upload pictures of your product that is on your phone or system.
- Click on the Addon and select from the drop-down, the addon(s) that is peculiar to the product (Restaurant)
-Click on the submit button.
- Click on the update profile button on the main dashboard. Here, you can make changes like your business name, email, or phone number. - Next you have to update your bank account details, update timings, order limit amount. - Next you have to update your time slots (that’s your opening and closing hours) you can also select “BUSY” when you are unavailable to take orders. - Next is time for preparation (how long it would take you to prepare and arrange the order you have accepted. - Next is delivery mode (options like takeaway, doorstep delivery) - Next choose the cuisines you offer (you can select as much as possible) - Next is notification sound (select your preferred sound for whenever you get a notification) - Then click on save changes. - You can also make changes to your profile like change password on the right-hand top corner of your dashboard.
- Go to 1timeshop.com and click on vendor login, input the details used upon registration. If you cannot access your account, it means your account has not been approved yet. Wait for a little while and then try again. - When your dashboard opens, it means your account has been approved.
After downloading the 1timeshop mobile App, sign up, input your personal details and your account is set.
then go to your profile icon (its the last icon by your right on the bottom of your screen)
Click on "my wallet" input the amount of money you want to add then click on "add money"
Choose the payment option from the + icon below or you click on the Paystack option above and follow the instructions as seen on your screen when you select the payment option you prefer. once you are done with that, it automatically takes you back to your wallet where your balance would have reflected. your wallet is then successfully funded. kindly go back to the home screen order away!
After downloading the app and inputting your personal details and funding your wallet.
click on the home button and choose "taxi and Keke" enter your destination by providing a valid address or a landmark that is close to where you're headed or select from your saved addresses.
please note that you don't need to input your current location as the map on the app does that for you except you're booking a ride for someone then you can use the location of the person you're booking a ride for
choose your preferred vehicle, and your preferred method of payment on the screen then click on "confirm" to proceed or click on schedule for a ride for later.
A rider that is within close proximity to you would accept your request and be on his way to you.
You would get push notifications of when he accepts your request when he moves, and when he arrives at your destination. you will also receive a four-digit OTP that would be provided to the driver when he arrives for security reasons. You can also track his movement with our Real-time life tracking on your screen on the app.
Once you arrive at your destination, he ends the trip from his end and you get a notification that you have arrived at your destination. you can add the driver to your preferred driver list, you can tip him as well, rate him and give feedback on your trip once you've arrived at your destination.
1. Select "Taxi" on the homepage.
2. Enter your destination.
3. Choose your vehicle type.
4. Apply promos (if available).
5. Pick your payment method (saved card, cash, or e-wallet).
6. Book your ride. Share the trip OTP with the driver before boarding to verify the correct vehicle.
1. Select "Restaurants" or "Marketplace" on the homepage.
2. Choose your vendor.
3. Select your items and add them to the cart.
4. Pick your delivery type (pickup or delivery).
5. Update your delivery address (if needed).
6. Choose your payment method (e-wallet, Paystack, Flutterwave, or saved card).
7. Add any instructions or promo codes.
8. Place your order.
1. Select "Logistics" on the homepage.
2. Enter pickup and drop-off details (multiple drop-offs possible).
3. Describe your package(s).
4. Choose your vehicle type (delivery bike, truck, or van).
5. Select your payment method.
6. Place your order and wait for rider acceptance.
7. Provide OTP upon pickup for confirmation.
1. Go to Profile > My Address.
2. Click "+" to add a new address.
3. Use the map or enter details.
4. Mark it as "Home," "Office," or "Other."
5. Save.
1. Go to Profile > Manage Cards.
2. Click "Saved" to view or "Add Card" for a new one.
3. Enter card details. A refundable ₦100 will be temporarily debited for verification.
4. You can delete or manage saved cards here.
1. Go to Profile > My Wallet.
2. Fund using your Dedicated Bank Account Shown with any Amount Or Choose "Fund Wallet" Enter Amount and select, Paystack, or Flutterwave.
3. Transfer the exact amount displayed at checkout for bank transfers to avoid errors.
1. Go to Profile > Emergency Contacts.
2. Add the desired contact(s). When you use SOS in taxis or logistics, these contacts will be notified with trip details for assistance.
At 1TimeShop, we’re committed to ensuring a seamless experience for our drivers. From adjustable pickup radii to transparent trip payments, we provide tools that help you earn more while driving smarter. For any further questions or concerns, feel free to reach out to our driver support team.
Drivers are paid daily, with the option for weekly incentives based on trip completion and other criteria.
6.4 Can I track my orders or rides in real time?
Yes, all orders and rides can be tracked using real-time GPS through the app.
6.5 Is there customer support available?
Yes, for any assistance, you can contact us at 09088999399 or email us at [email protected].
7. Conclusion: Why 1TimeShop is Your Ultimate All-in-One Solution
Whether you’re a vendor looking to grow your business, a driver seeking flexible and well-paid work, or a customer in need of fast and reliable delivery services, 1TimeShop is the all-in-one platform that makes life easier. With services ranging from food ordering and taxi booking to logistics and service providers, everything you need is just a tap away.
Download 1TimeShop today and start experiencing the convenience for yourself!